We are in the midst of implementing Duo within our org and want to use it just about everywhere, including Okta Workflows. We have been building Slack slash commands that do some serious changes (more posts on those later) and we thought prompting the user running the command with Duo would be another layer of security (after verifying they are in the appropriate Okta Groups to perform the action to begin with.)
Here’s how we implemented Duo Auth in Connector builder.
Requirements
- Duo
- Okta Workflows
- Connector Builder Beta
Turning on Connector Builder
- Login to Okta Admin Console
- Click Settings > Features
- Turn on Workflows Connector Builder

Create Connector
- Click the + Button to add a new connector and name it something that makes sense in your org. We used “Duo Auth API.”

- You will be greeted with an Overview tab where we can start by creating the necessary authentication. Click “Set up authentication”

- Select “Custom” Auth Type
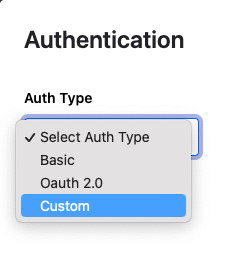
- Add the following Parameters and types then click Save.
- Integration Key – Text
- Secret Key – Password
- API Hostname – Text

Create Action Flow
Connector Builder does not yet have the ability to import flows so we’ll have to build from scratch. That is documented below. If Connector Builder adds the ability to import flows, those are in the attached Github repo. This builds out a Raw Request to the Duo Auth API based on the documentation here: https://duo.com/docs/authapi#authentication
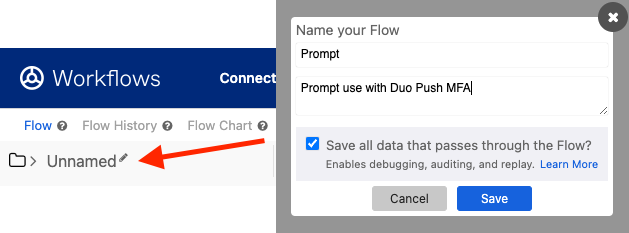
- Click the Flow tab and “Create a New Flow Now”

- Click “Unnamed” to name the action. We’ll call this Prompt. Create a description (this will be seen in Okta workflows when choosing an action) Also check the box to Save all data that passes through the Flow. Click Save.
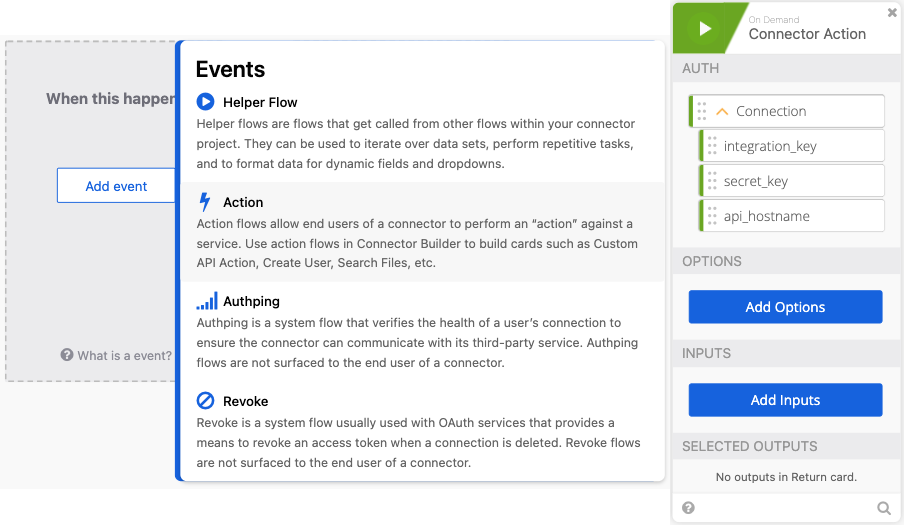
- Click Add event > Action
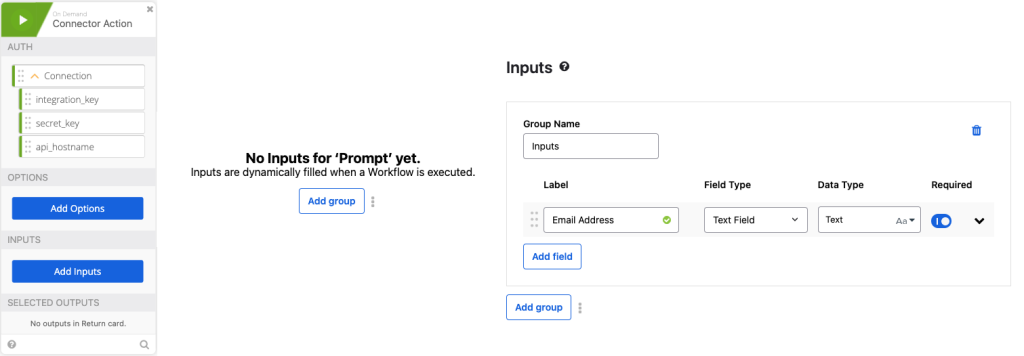
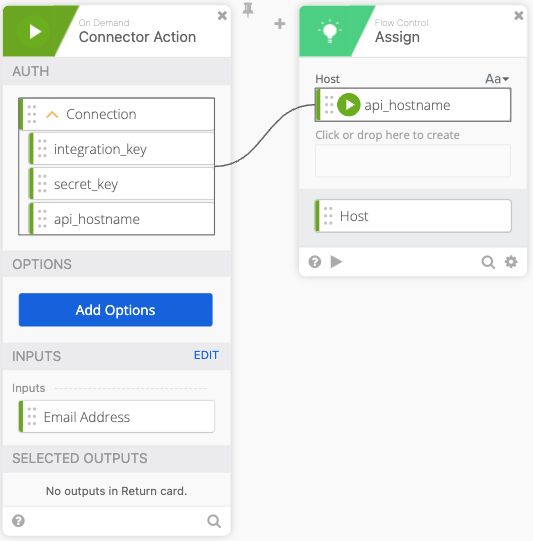
- Click Add inputs in the Connector Action Card > Click Add Group add the Label “Email Address” and make it Required > Click Save.
- Click Add function > Assign. Click and name the Assign “Host” and drag api_hostname to the assign.
- Click the + to add another function and choose Compose, in Compose do a single Return in the compose field, name the output “Carriage Return.”
- Create a Replace function to URL encode our userEmail variable set it to Email Address variable.
- Create a Concatenate function text 1= “device=auto&factor=push&username=” text 2 is our Email Address Variable. Name the output of this “Body.”
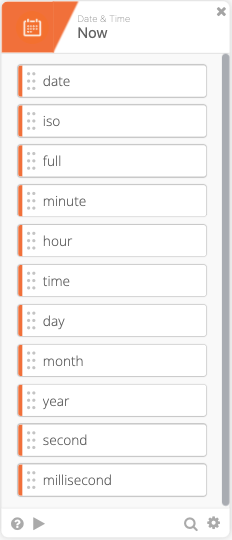
- Add the Now Function to get the current Date & Time
- Add Date to Text function (Per Duo Auth API documentation)
- Set Start to iso (from Now function)
- Format = “ddd, D MMM Y H:mm:ss Z”
- Zone = Africa/Abidjan
- Output = RFC 2822
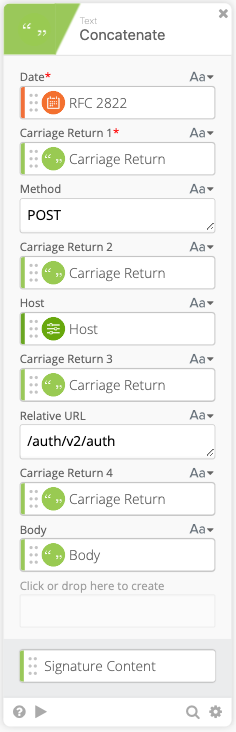
- Create another Concatenate function where we will create the Signature Content to create our Encrypted Key
- Date = RFC 2822 Variable (Set in Step 10)
- Carriage Return 1 = Carriage Return Variable
- Method = POST
- Carriage Return 2 = Carriage Return Variable
- Host = Host Variable (Set in Step 5)
- Carriage Return 3 = Carriage Return Variable
- Relative URL = /auth/v2/auth
- Carriage Return 4 = Carriage Return Variable
- Body = Body Variable (Set in Step 8)
- Create an HMAC function with the follow settings:
- algorithm = sha1
- key = secret_key (obtained from the connector action)
- data = Signature Content (created in step 11)
- digest = hex
- Output = HMAC Output
- Create a Concatenate function to build our username:password per Duo’s documentation.
- text 1 = Integration Key (obtained from the connector action)
- text 2 = :
- HMAC Output = HMAC Output (Obtained from Step 12)
- Output = Auth
- Create a Base64 encoding of our Auth function and name it’s output “Token”

- Create a Concatenate function to build out the Basic Token for use later in our Header with the following options (Note, when typing “Basic ,” make sure you have a space at the end otherwise this will all fail.)
- text 1 = Basic
- text 2 = Token
- output = Basic Token
- Create a Length function to get the length of the token (required in our Header)
- Create a Construct function to build a Header as an Object. The name of each section matter as they create the Object as JSON.
- Date = RFC 2822 (Created in Step 10)
- Authorization = Basic Token (Created in Step 15)
- Host = Host (Created in Step 5)
- Content-Length = length (Created in Step 16)
- Content-Type = application/x-www-form-urlencoded
- Output = Header
- Concatenate to build our URL to call the API
- text 1 = https://
- text 2 – Host (Created in Step 5)
- Relative URL = /auth/v2/auth
- output = Call URL
- Raw Request – this calls Duo and prompts the user with a Duo push
- url = Call URL (Created in Step 18)
- method = POST
- headers = Header (Created in Step 17)
- query = {}
- body = Body (Created in Step 8)
- JSON Parse to get a clean version of the body returned so we can act on the Results of the push.
- string = body (Output of the HTTP Raw Request)
- Object Get Multiple which pulls out the result, status, and status message
- object = output (Created in Step 20)
- response.result
- response.status
- response.status_msg
- Return Outputs
- Result = response.result (Created in Step 21)
- Status = response.status (Created in Step 21)
- Status Message = response.status_msg (Created in Step 21)
We have the structure now to prompt a user with Duo. We still need to build out the Duo Auth API and our Connector Authping. Since we need the keys and hostname to use/test authping, we’ll create that now.
Create Duo Application API
- Login to Duo
- Click Applications on left hand side
- Click Protect an Application

- Filter by keyword: Auth API and Choose Protect
- Scroll to the bottom of the Auth API and change the name to whatever action you’d like the user to see/understand. We have an app call Locksmith and call the Duo Auth API that’s used to Prompt, Locksmith, so the user knows that was the application prompting them.
- Keep this page open to use later. We’ll need the contents of Integration Key, Secret key, and API hostname.
Creating Authping Flow
This flow is used to determine if the Duo Auth service is up. Ideally we’d use the /check endpoint of the Duo Auth API to validate credentials but I’ve been unable to get that to work, we are working with Duo to try to figure out the issue. For now, we’ll build with the /ping endpoint.
- Login to Connector Builder and click on the Duo Auth Connector
- Click the Flows Tab
- Click Duplicate our Prompt Flow so we can use the structure and tweak for /ping. Let’s also set the name to Ping.
- First Change is to change the action, by deleting the current one and enabling Authping.
- Let’s update our variables that we changed/killed when we removed the original action. We’ll need to update the integration_key, secret_key, and api_hostname. See the following gifs for changes.
- We need to update our Signature Content to fit the /ping GET requirement. The Concatenate function should be as follows, note the double carriage returns at the end, this is required per Duo’s documentation see GET request require section:
- Date = RFC 2822
- Carriage Return 1 = Carriage Return
- Method = Get
- Carriage Return 2 = Carriage Return
- Host = Host
- Carriage Return 3 = Carriage Return
- Relative URL = /auth/v2/ping
- Carriage Return 4 = Carriage Return
- Carriage Return 5 = Carriage Return
- We now need to clean update our Construct, we won’t be sending a body as /ping doesn’t require parameters so the length is now 0. If you want to be really clean, you can remove the Length function all together, for the purposes of this, I’m not going to.
- We need to change the relative URL in our Call URL from /auth/v2/auth to /auth/v2/ping. remove the body from the Raw Request and Change the Method to GET (Changing Method is not in the gif below.)
- We can remove the Parse and Get Multiple functions as this only returns true or false and there can return true if it works.
- Now let’s test our Authping, click test and create a Connector using the integration key, secret key, and api hostname from the Duo Auth API we created earlier. Click Save then Test and create your Connection, give it a nickname and copy/paste the required credentials.
Authping works! Now we can put it all together and prompt for Duo Auth.
Testing Prompt
- Go to the Flows tab and turn on Prompt
- Click into Prompt and click Test, enter your email address to receive a test prompt. Depending on your response you will see a result of “allow” or “deny” and can act on those accordingly.
Branding our Connector
- Go to the Overview Tab, find Settings and click “Edit”
- Here we can brand our connector as if it was direct from Duo.
- Here is Duo’s Brand guidelines if you want the exact colors: https://brandfolder.com/duo
- First we’ll update the color
- Next find a logo you’d like to use with the connector and click the upload button.
- If you want to post Duo Auth API documentation you can add that to User Documentation URL, then Click Save.
Deploying our Connector
- Get back to the root of the connector folder and click on the Deployment tab.
- Click the “Validate Connector” button. Then click Done.

- If you wanna let everyone know this connector is still in testing, just “Deploy test version” otherwise “Deploy local connector” for now we’ll deploy a test version.
Testing our Connector in Workflows
- Login to Workflows or click the Workflows home button

- Find the workflow you’d like to use the connector with or open a new workflow and “Add app action” search for duo and click “Include test connectors” check box if you only deployed a test version.
- Click on your Duo Auth Connector and click “Prompt” we can then setup our connection in Workflows, you can use the same keys and hostname that you previously used to test or create new ones to match the name of the Workflow.
- ⚠️ – Remember to Name the connection nickname what you named the Duo Auth API so that it’s easy to know what’s being used
- After setting up the connection click Test and you’re on your way, I’d suggest using an If/Else function after to act on “allow” or “deny”