
Custom Jamf Pro Connector in Okta Workflows
I’ve been spending much of my workday in Okta workflows building out different tools and have found the built-in Jamf Pro connector lacking. So I’ve used Connector builder to create my own. A big win is being able to use both the Classic and new Jamf Pro APIs. The workflows we have built that work with/use Jamf Pro are:
- Locking devices using Slack
- Looking up devices records using Slack
- Parse application patch data and pass that into a bash script
- Move users around in Duo based on OS compliance
- Re-enroll devices with MDM using the Jamf Pro API (Self heal)
- Automatically install Microsoft Office if the user was put in a group to get the license
- Automatically install our VPN if the user was put in a specific group in Okta
- Give users a wipe computer button in Self Service if put in a specific group in Okta
- Post Patching Status to Slack Channel
- Coming soon, Self Service Filevault Key retrieval (hoping in Jamf Pro 10.43)
As you can see, we use Jamf Pro and Okta workflows quite a bit and we are always coming up with new ideas. We are hoping to use Okta Workflows to manage our asset inventory and possibly access review and admin role assignments in Jamf Pro, but that’s a post for a later date.
Jamf has stated for a while that Basic Authentication (Direct Username and Password) would be deprecated in an upcoming version of Jamf Pro and instead use Token Based Authentication. I reached out to Okta to find out if that was on their radar and what that change would entail and they just said it’s coming but no timeframe. I couldn’t get caught in not knowing when this was going to occur or if Okta wouldn’t match Jamf’s timeline. Connect Builder was the answer. I had already worked with it to get Duo Authentication to work and that auth is much more confusing than Jamf Token. I decided we can at least try to get ahead of the situation and have our own custom connector.
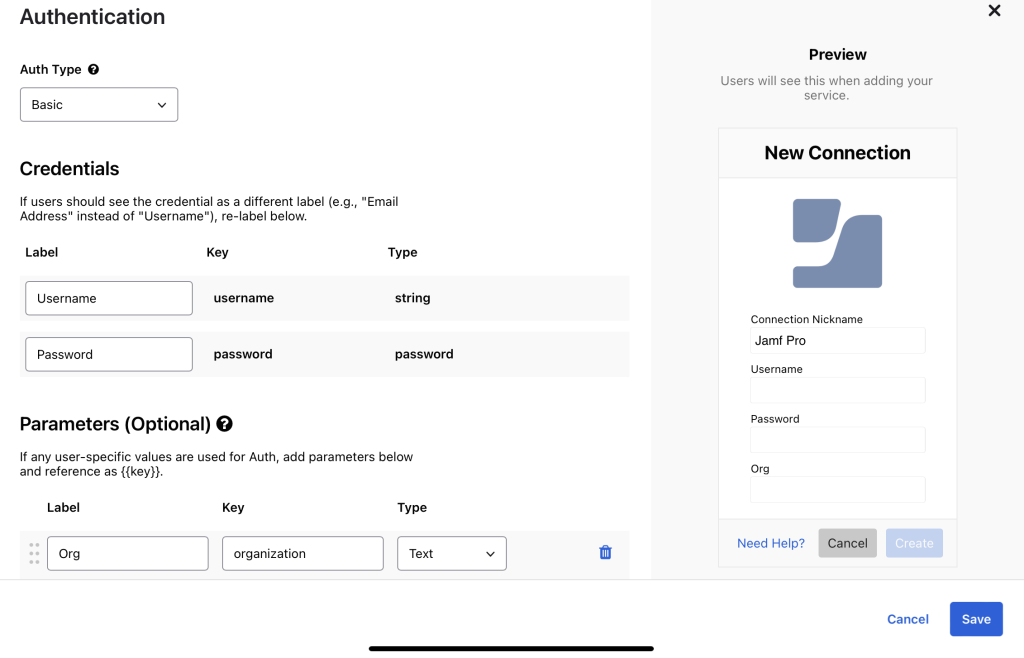
To start I needed to set up Authentication, we can work with Basic auth and require a username, password, and the org name for the Jamf Cloud instance (https://orgname.jamfcloud.com.) This ensures the connector can be used with all Jamf instances and is not limited to the main instance we work in. All custom connectors I make should be built in a way that can be used in any environment.
Here is the general overview of the flow we will create below:

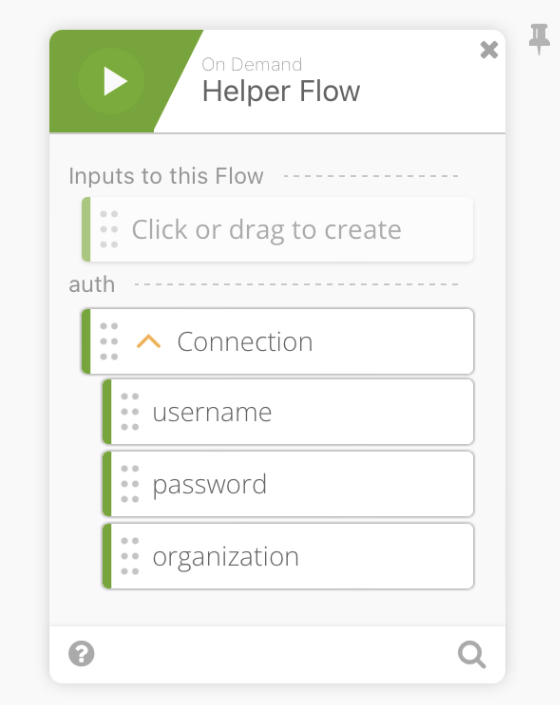
After saving out auth, we need to set up a workflow to get a token to work with Jamf Pro. At first, I created a normal action to “Get a Token” but found it more helpful to have a helper flow to “Get a Token” as we can always get a token when we call a different API. For our helper flow, we only need the authentication data which is automatically given.
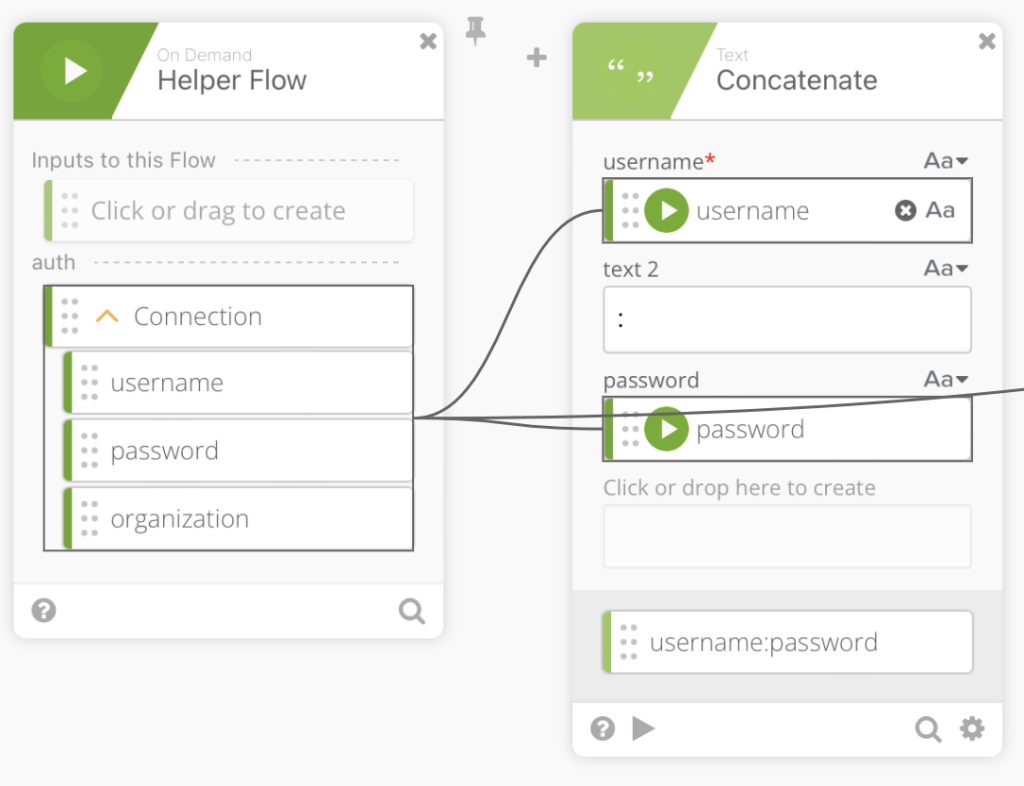
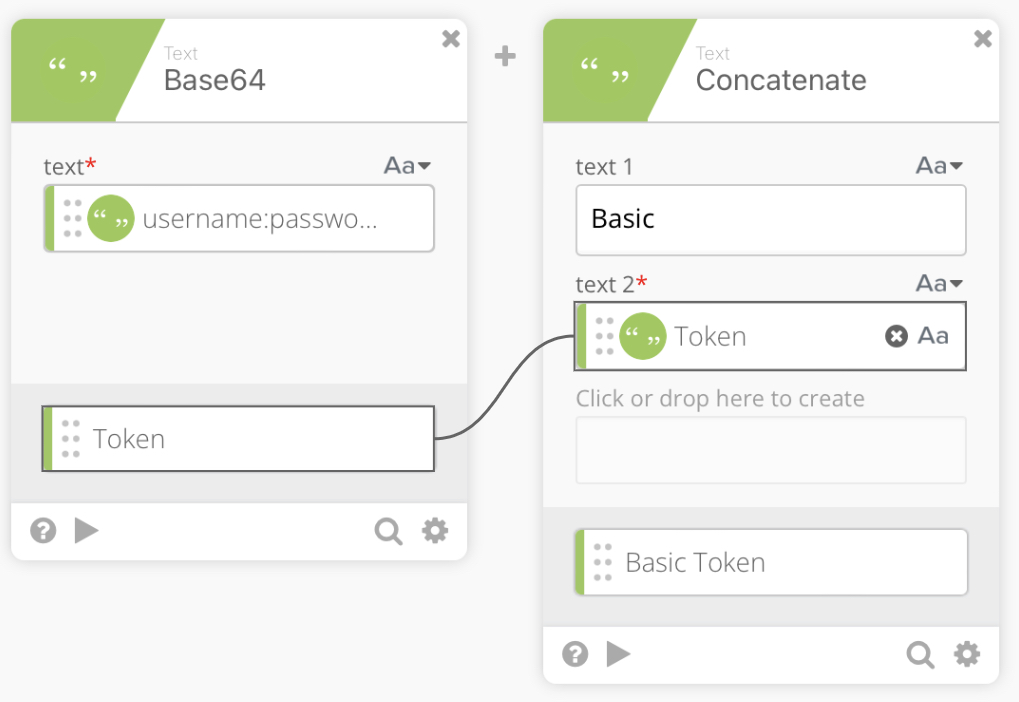
We then use a ”Concatenate” function to create username:password by mapping the username and password into the concatenate function.
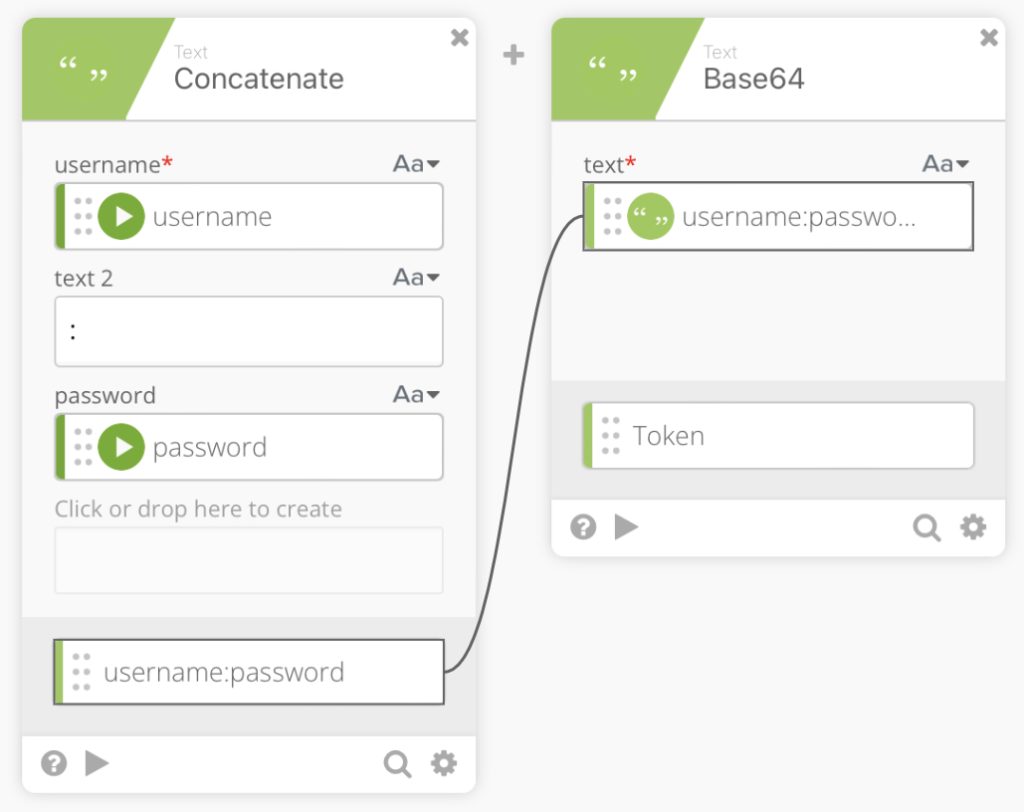
We then use the Base64 encode function to encode our concatenation output.
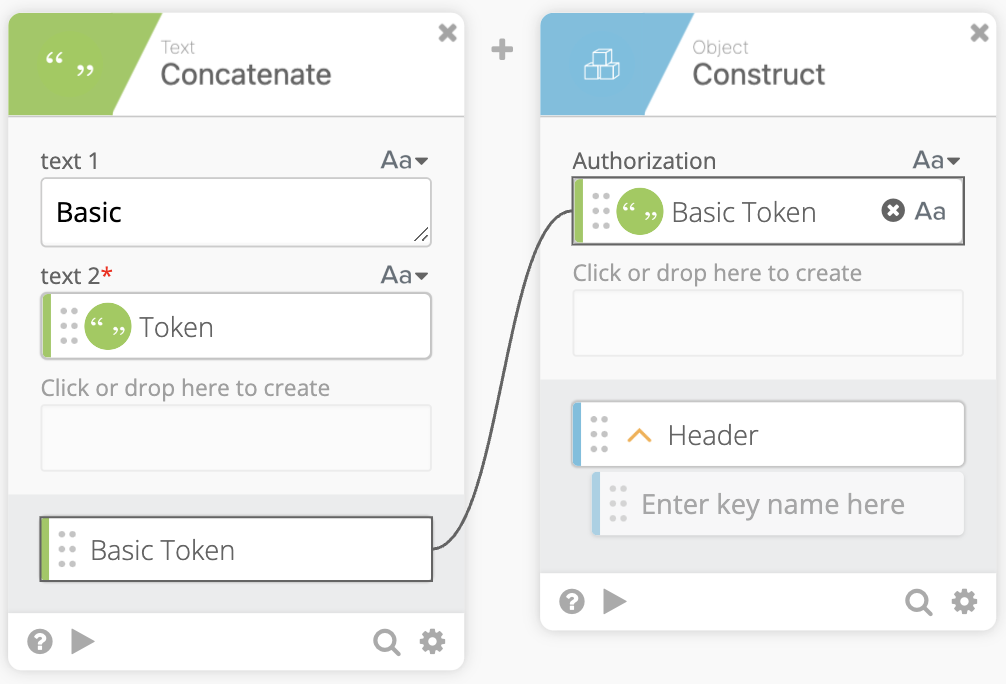
Next, we have another ”Concatenate” function to create a Basic Token which is actually just Basic along with our mapped Token. Note: make sure to add the space after Basic so that everything maps properly.
We now can pass our Basic Token into an Object Construct function to create the Header which will contain Authorization: Basic Token
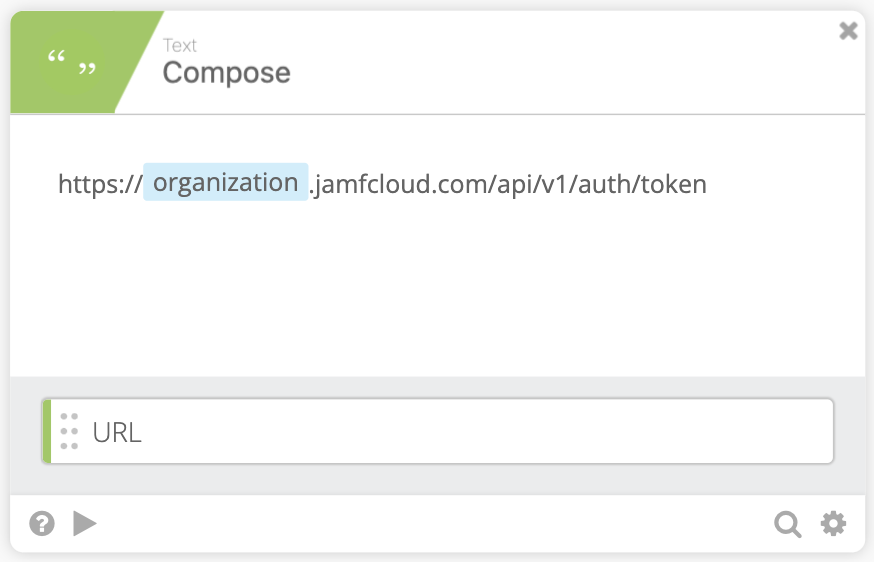
We now create the URL to call the Jamf Pro API to get our Token. We use a Compose function and can pass the Organization value from the auth Connection value obtained when setting up the flow. (Jamf Documentation)
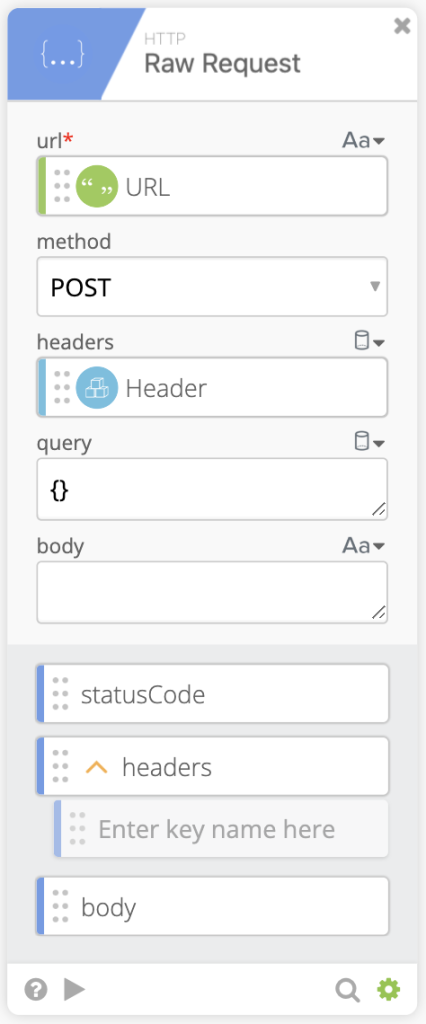
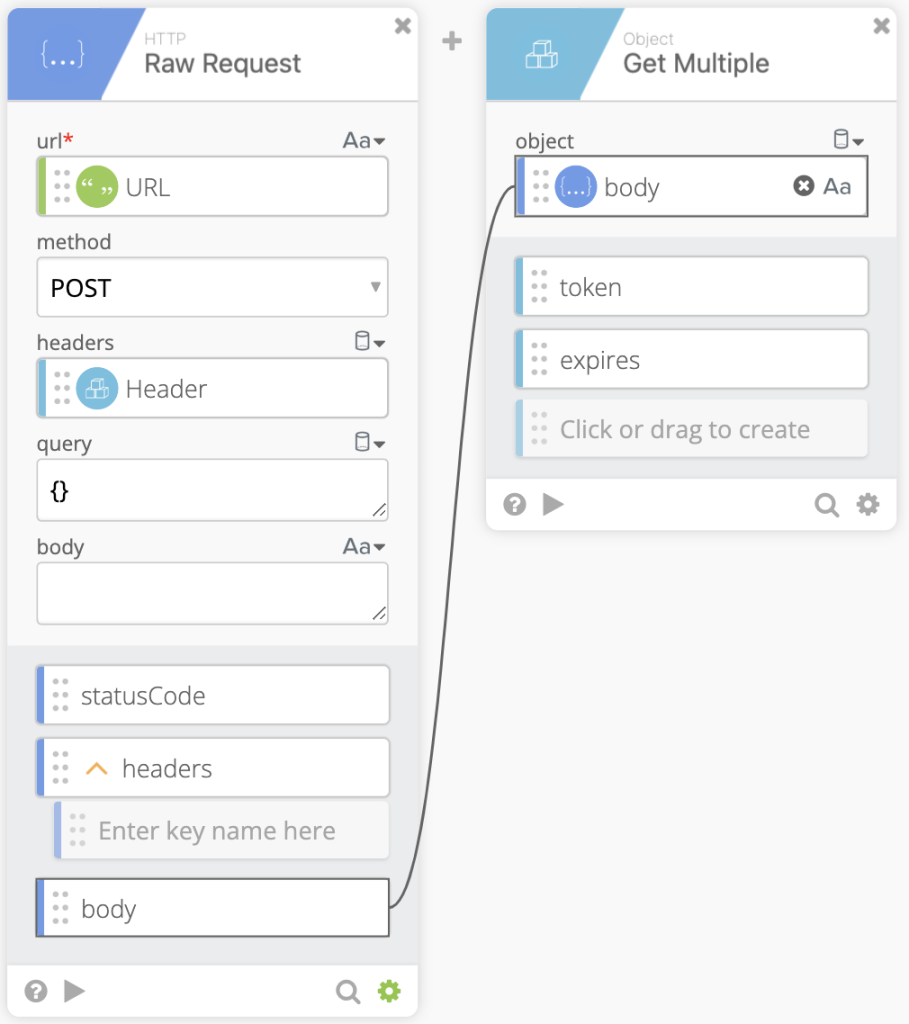
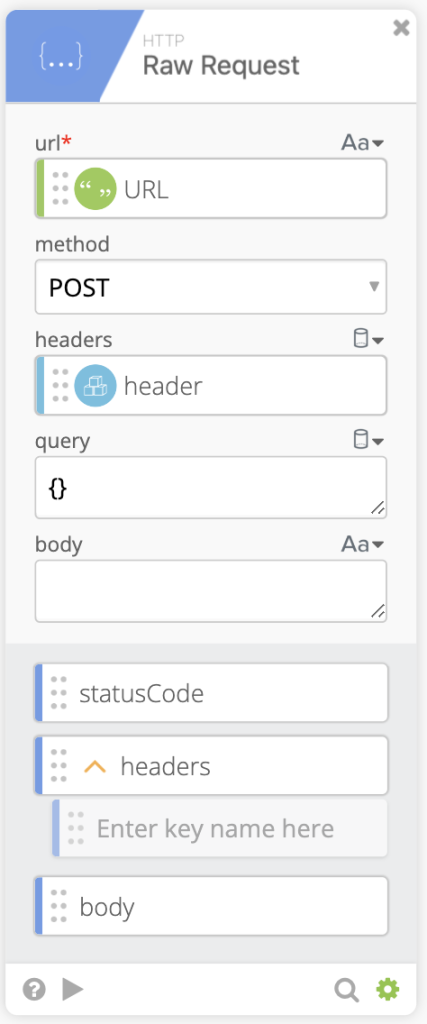
Now call the API using the HTTP Raw Request Function. Pass in the URL we made in the last step as well as the Header we created two steps ago. They go into the corresponding location in the function. We also want to make sure the method is set to POST.
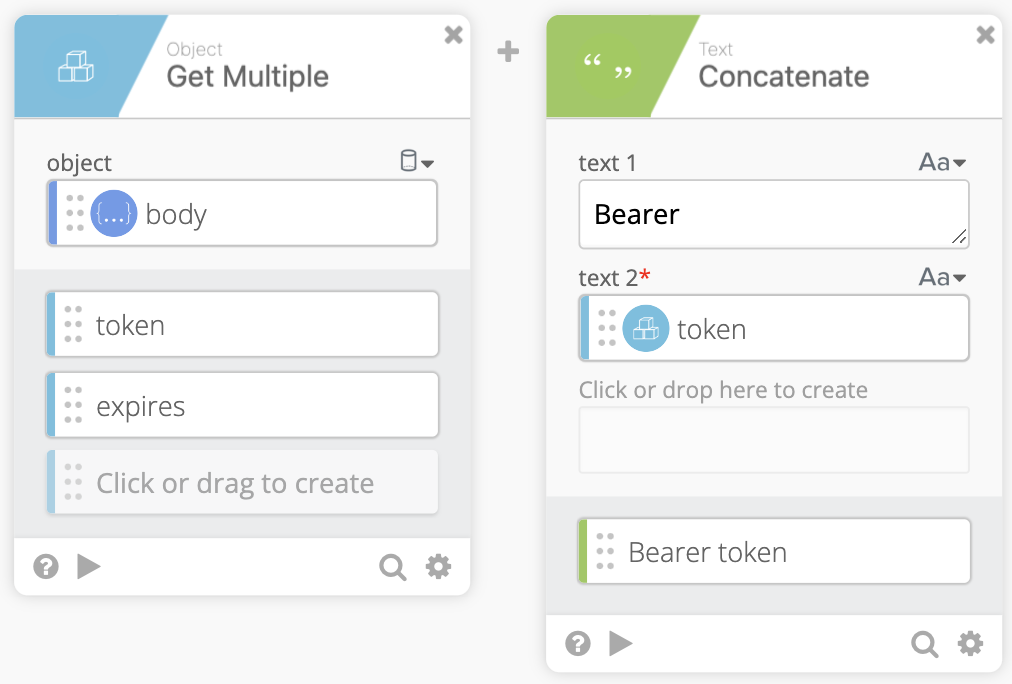
Using the Object: Get Multiple function we can pull the token and expires strings out the body returned from the HTTP Raw Request.
After pulling the token and expires strings we pass the token to a Concatenate function to make usage for our future self easier. In the concatenate function text 1 should contain Bearer (Make sure to add the space after Bearer) then pass the token as text 2. Rename the output to Bearer token.
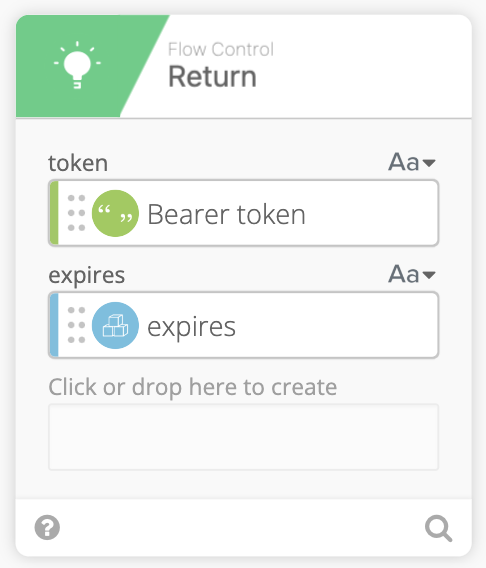
Finally we can pass the Bearer token and expires strings to a Return function.
Redeploy the Jamf Framework
Alright David, how can I use this? What’s the point? Now we can create action flows that use the token inside. We’ll create the action Flow to Redeploy the Jamf Framework from the Jamf Pro API, which requires a Bearer Token to call against.
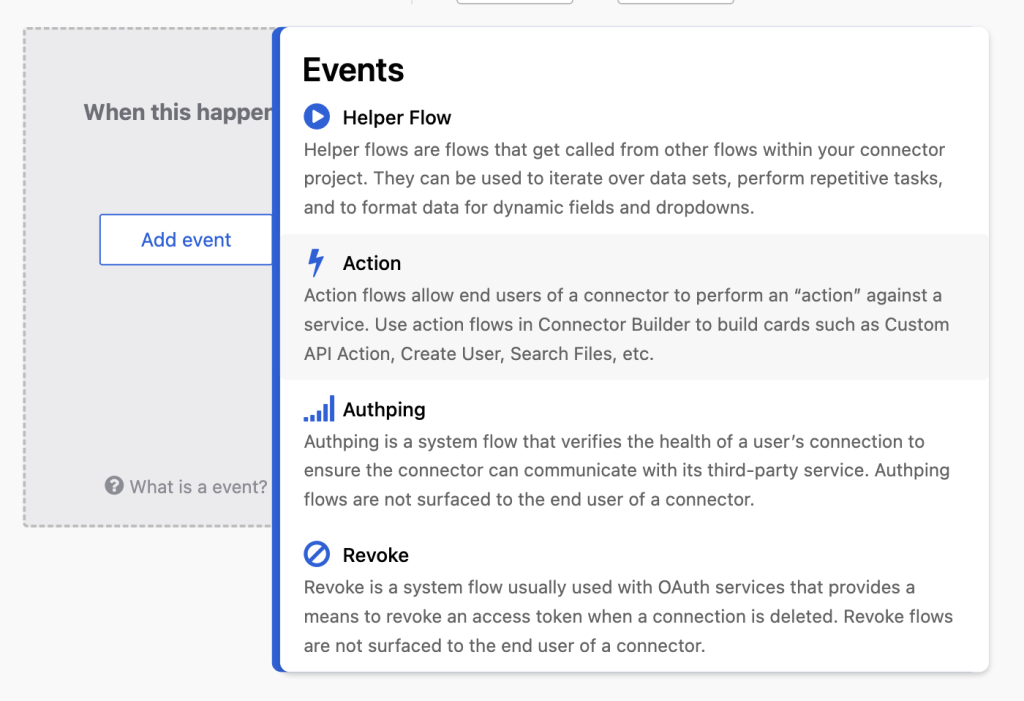
- Create + New Flow, Add Event
Action
- Click Add Inputs > Add Group > Add Static Group then Label is Jamf ID, Data Type = Number, Required = True
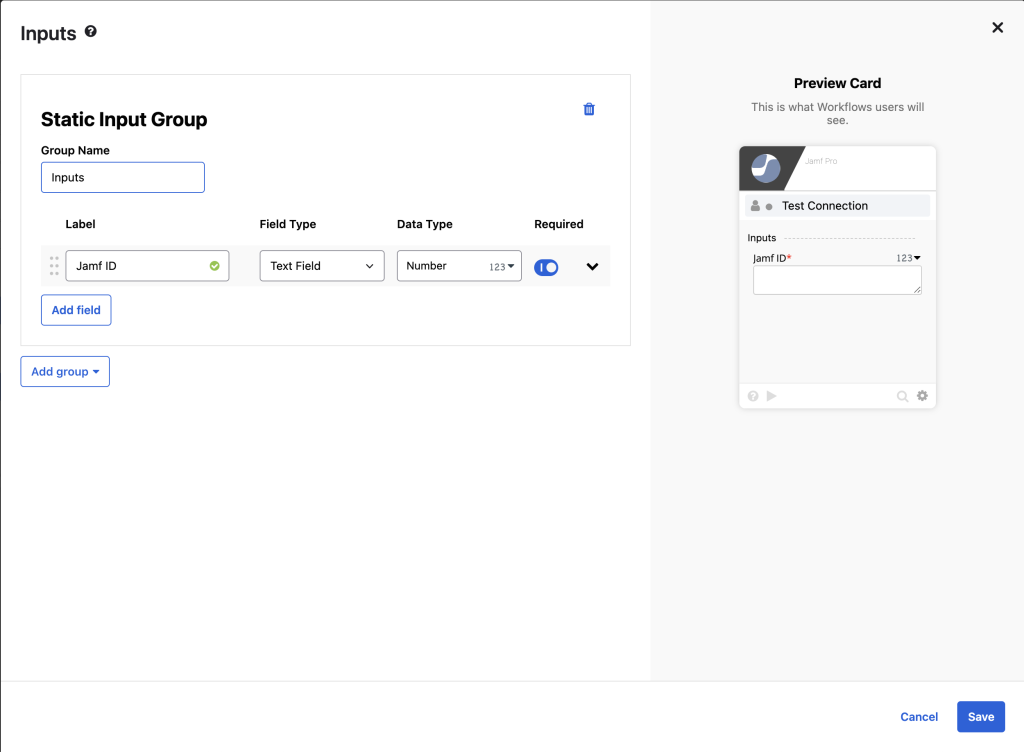
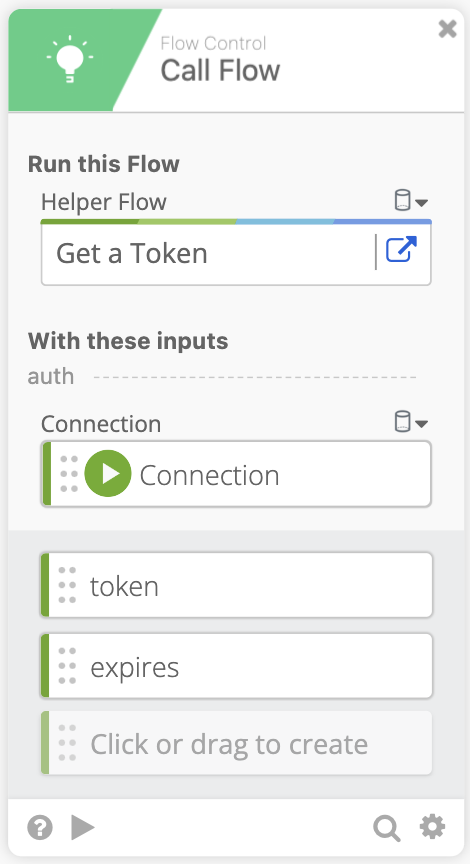
- Click Add Function and using the Call a Flow function. Click helper flow and choose our Get a Token flow we created earlier. Then pass the Connection into the Connection location. We also need to click and type in
tokenandexpiresin the output section. It should look like the image below.
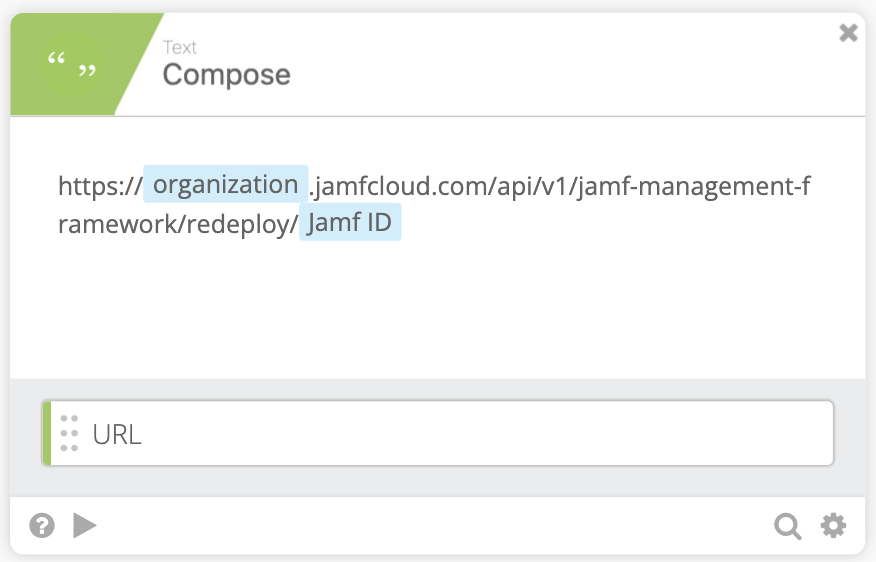
- Using the compose function we can create the URL to call against the Jamf Pro API. The url is as follows:
https://organization.jamfcloud.com/api/v1/jamf-management-framework/redeploy/JAMF ID
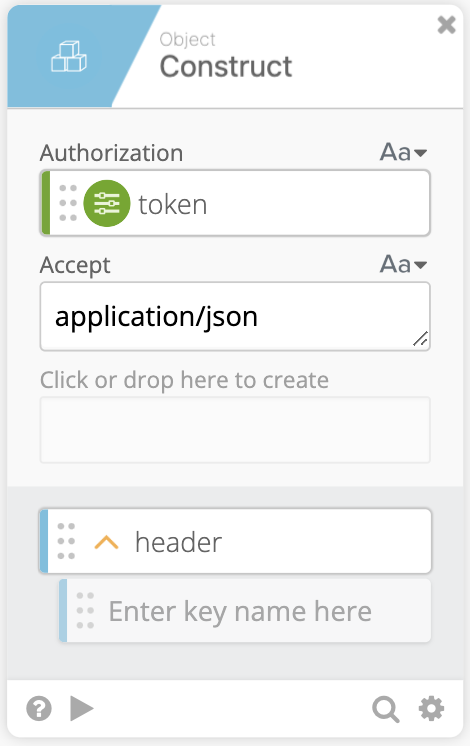
- Using Object Construct we can create our Object header. Just like in the Get a Token flow we’ll need the
Authorization: Bearer tokenbut now we also needAccept: application/json
- We can now call the API using the HTTP Raw Request function and pass in the Header Object and URL. We’ll also use the POST method.
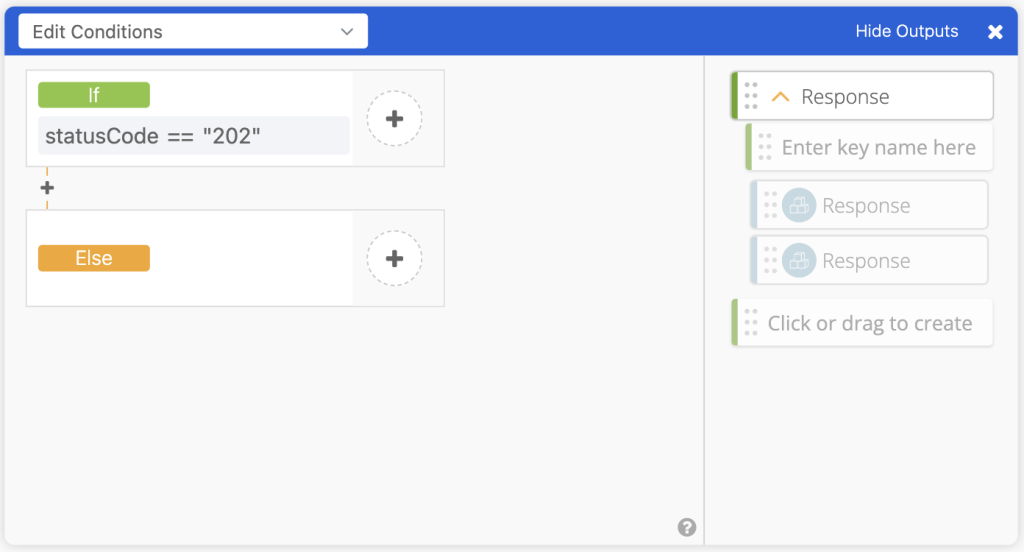
- Due to the different possibilities of what the Raw Request body can return based on the statusCode, we use an If/Else/If function (could be just an If/Else function, but we find If/Else/If easier to read/troubleshoot). First If function is if
statusCode == 202then go to step 8, else go to step 9.
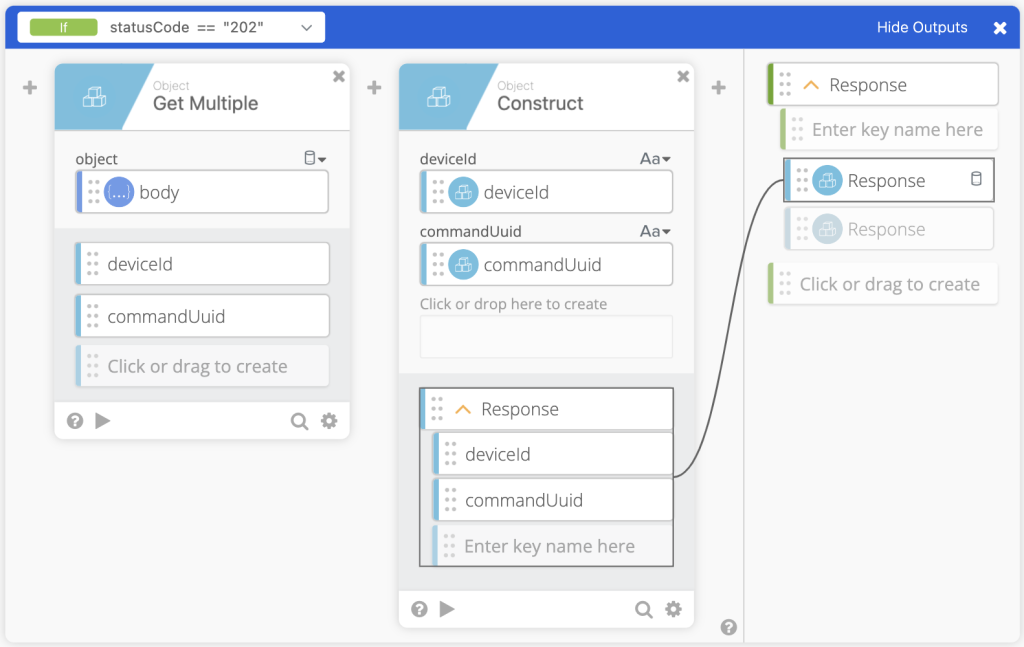
- Using the Object Get Multiple we can pass the body in to get out
deviceIdandcommandUuid. We then pass that to an Object Construct function to create the Response Object. Then pass that to the Output of the If/Else/If.
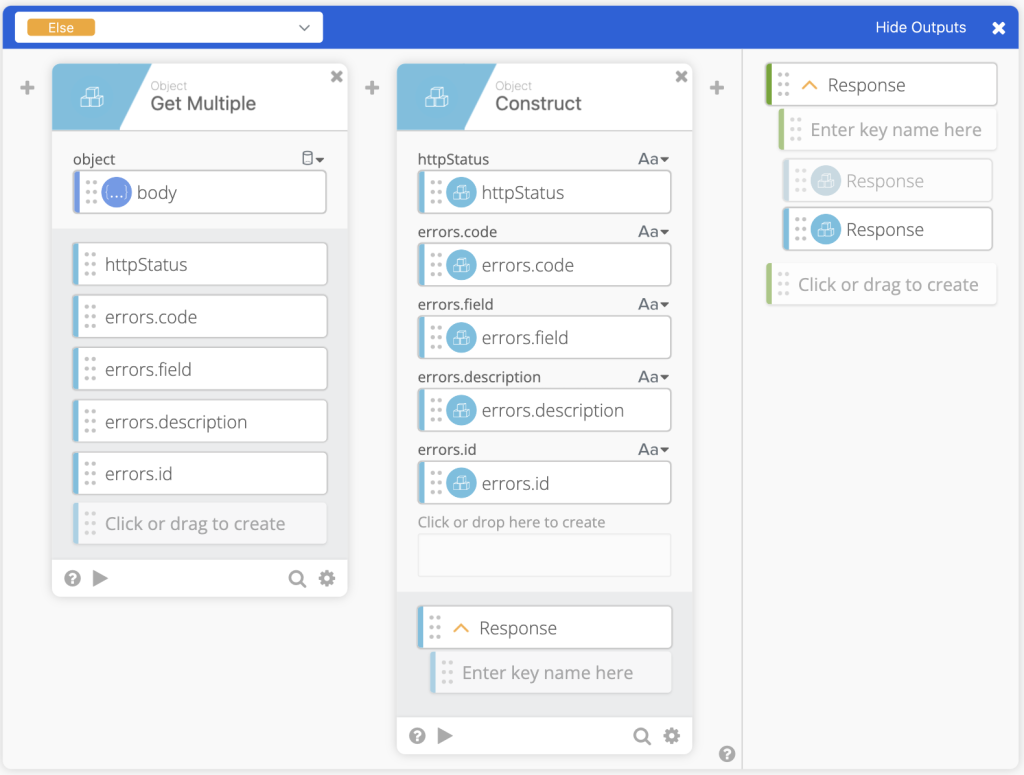
- If statusCode is not equal to 202, we then get the errors from the body and create the Response object and pass that object to the Output of the If/Else/If.
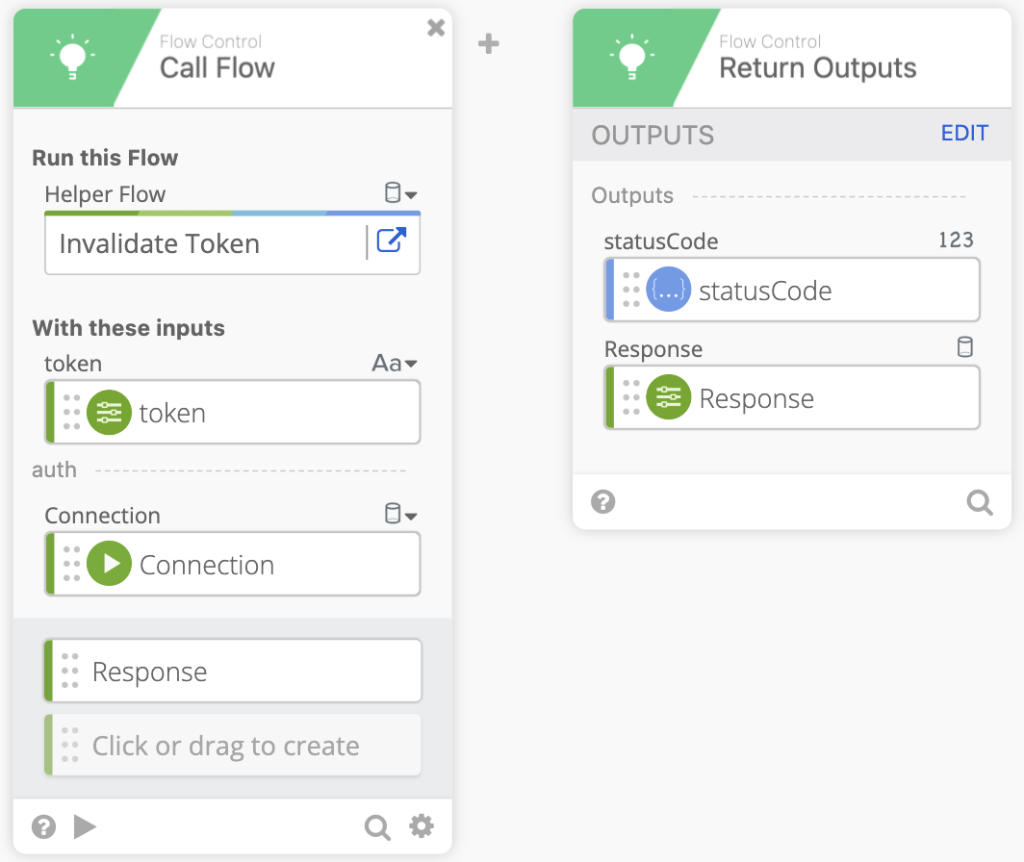
- At this point we invalidate the Token that was used to call the HTTP Raw Request, this is a helper flow. If the helper flow doesn’t exist that’s fine as the token will expire after 30 minutes. We can then Return Outputs of
statusCodeandResponse.
To use this Connector, we need to push it to Okta Workflows. Follow this documentation to Deploy the Connector.